Installation
To install a pre-built phoenix, use these directions:
- Download and expand the latest phoenix-hbase-[hbase.version][phoenix.version]-bin.tar.gz for your HBase version.
- Add the phoenix-server-hbase-[hbase.version]-[phoenix.version].jar to the classpath of all HBase region servers and masters and remove any previous version. An easy way to do this is to copy it into the HBase lib directory
- Restart HBase.
- Add the phoenix-client-hbase-[hbase.version]-[phoenix.version].jar to the classpath of any JDBC client.
To install Phoenix from source:
- Download and expand the latest phoenix-[phoenix.version]-src.tar.gz for your HBase version, or check it out from the main source repository
- Follow the build instructions in BUILDING.md in the root directory of the source distribution/repository to build the binary assembly.
- Follow the instructions above, but use the assembly built from source.
Getting Started
Wanted to get started quickly? Take a look at our FAQs and take our quick start guide here.
Command Line
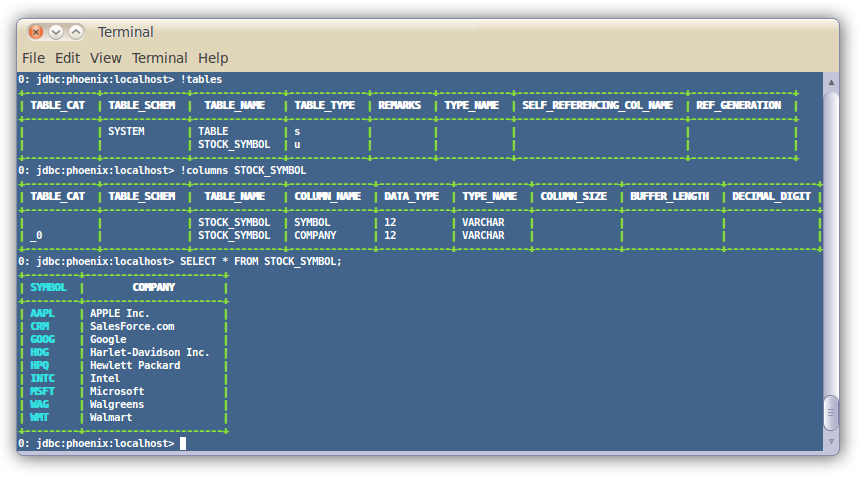
A terminal interface to execute SQL from the command line is now bundled with Phoenix. To start it, execute the following from the bin directory:
$ sqlline.py [zk quorum hosts]
To execute SQL scripts from the command line, you can include a SQL file argument like this:
$ sqlline.py [zk quorum hosts] ../examples/stock_symbol.sql

For more information, see the manual.
Loading Data
In addition, you can use the bin/psql.py to load CSV data or execute SQL scripts. For example:
$ psql.py localhost ../examples/web_stat.sql ../examples/web_stat.csv ../examples/web_stat_queries.sql
Other alternatives include:
- Using our map-reduce based CSV loader for bigger data sets
- Mapping an existing HBase table to a Phoenix table and using the UPSERT SELECT command to populate a new table.
- Populating the table through our UPSERT VALUES command.
SQuirreL SQL Client
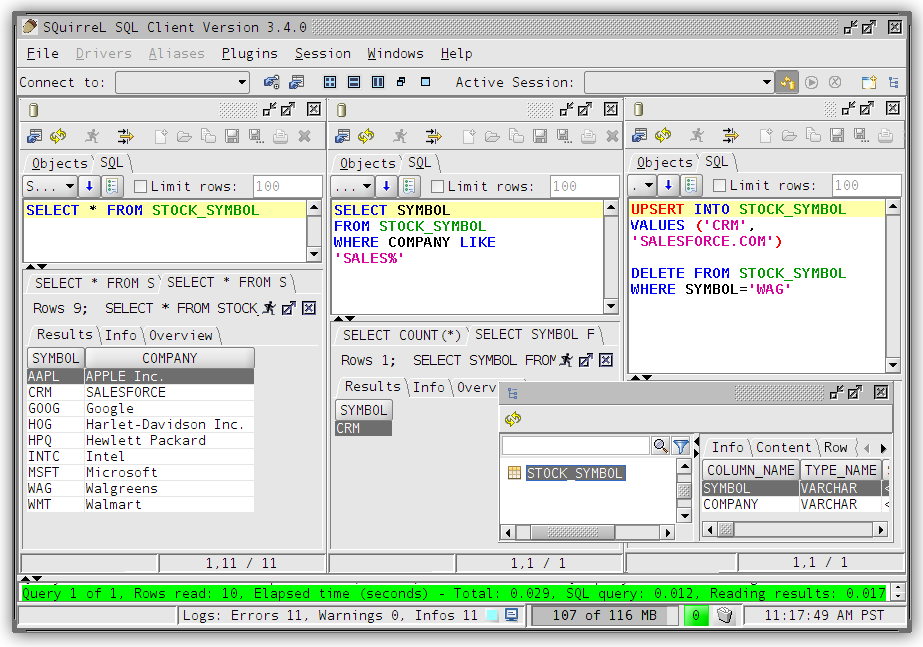
If you'd rather use a client GUI to interact with Phoenix, download and install SQuirrel. Since Phoenix is a JDBC driver, integration with tools such as this are seamless. Here are the setup steps necessary:
- Remove prior phoenix-[oldversion]-client.jar from the lib directory of SQuirrel, copy phoenix-[newversion]-client.jar to the lib directory (newversion should be compatible with the version of the phoenix server jar used with your HBase installation)
- Start SQuirrel and add new driver to SQuirrel (Drivers -> New Driver)
- In Add Driver dialog box, set Name to Phoenix, and set the Example URL to jdbc:phoenix:localhost.
- Type “org.apache.phoenix.jdbc.PhoenixDriver” into the Class Name textbox and click OK to close this dialog.
- Switch to Alias tab and create the new Alias (Aliases -> New Aliases)
- In the dialog box, Name: any name, Driver: Phoenix, User Name: anything, Password: anything
- Construct URL as follows: jdbc:phoenix: zookeeper quorum server. For example, to connect to a local HBase use: jdbc:phoenix:localhost
- Press Test (which should succeed if everything is setup correctly) and press OK to close.
- Now double click on your newly created Phoenix alias and click Connect. Now you are ready to run SQL queries against Phoenix.
Through SQuirrel, you can issue SQL statements in the SQL tab (create tables, insert data, run queries), and inspect table metadata in the Object tab (i.e. list tables, their columns, primary keys, and types).

Note that most graphical clients that support generic JDBC drives should also work, and the setup process is usually similar.
Samples
The best place to see samples are in our unit tests under src/test/java. The ones in the endToEnd package are tests demonstrating how to use all aspects of the Phoenix JDBC driver. We also have some examples in the examples directory.